
Add, remove, or update locations in a project
During your analysis, you may need to add, remove, or update locations in your project. The available actions depend on the type of Optimize project you are working on.
This article explains how to update your project and recalculate the results.
Add new locations
Hotspots or Optimal location characteristics projects
To add new locations to a hotspot or optimal location characteristics project:
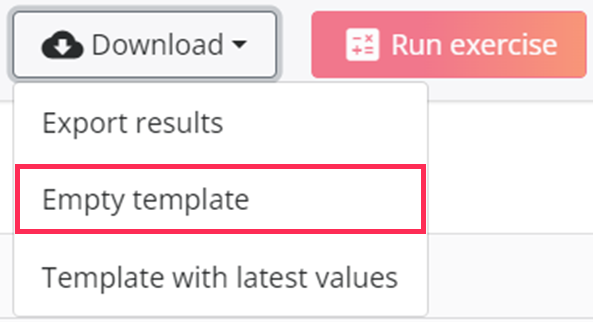
- Open the existing project
- Click Download.
- Select Empty template.
- Complete the template by following the guidelines in the article Prepare your list of locations in the template.
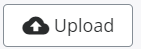
- Upload the completed file by clicking Upload.
- Run the project again by clicking Run exercise.
The new locations will be added to your project and included in the new calculation.
Optimal reduction projects
To add locations to an optimal reduction project:
- Open the right project
- Select additional locations from the table or directly from the location logos on the map.
- Click Test reduction again to restart the project and calculate the updated results.

Remove individual locations
Hotspot and optimal location characteristics projects
There are three ways to remove individual locations from your project.
From the table
In the table view, click the bin icon next to the location you want to remove.

From the map
In the map view, click the location you want to remove and select the bin icon.
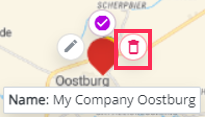
From the location pop-up
Open the location pop-up. You will see a bin icon below the map in the pop-up. Click this icon to remove the location.
After removing the location, run the project again by clicking Run exercise.
Optimal reduction projects
To remove locations from an optimal reduction project:
- Deselect the locations you no longer want to include in the analysis. You can do this from the table or from the map.
- Click Test reduction again to restart the project and calculate the updated results
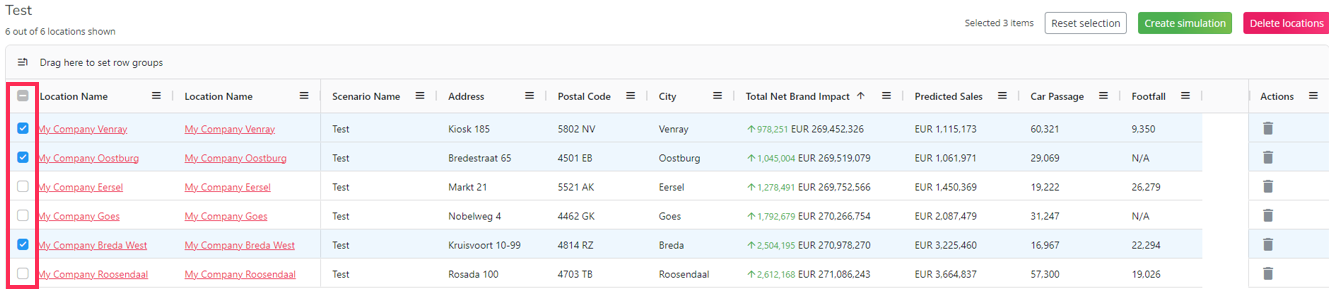
Remove locations in bulk
To remove multiple locations at once:
- Go to the Table view.
- Select the locations you want to remove.
- Click Delete locations.
Update individual locations
You may need to update a location if its position, characteristics, or configuration need to be corrected or refined.
These are the general steps to update an individual location:
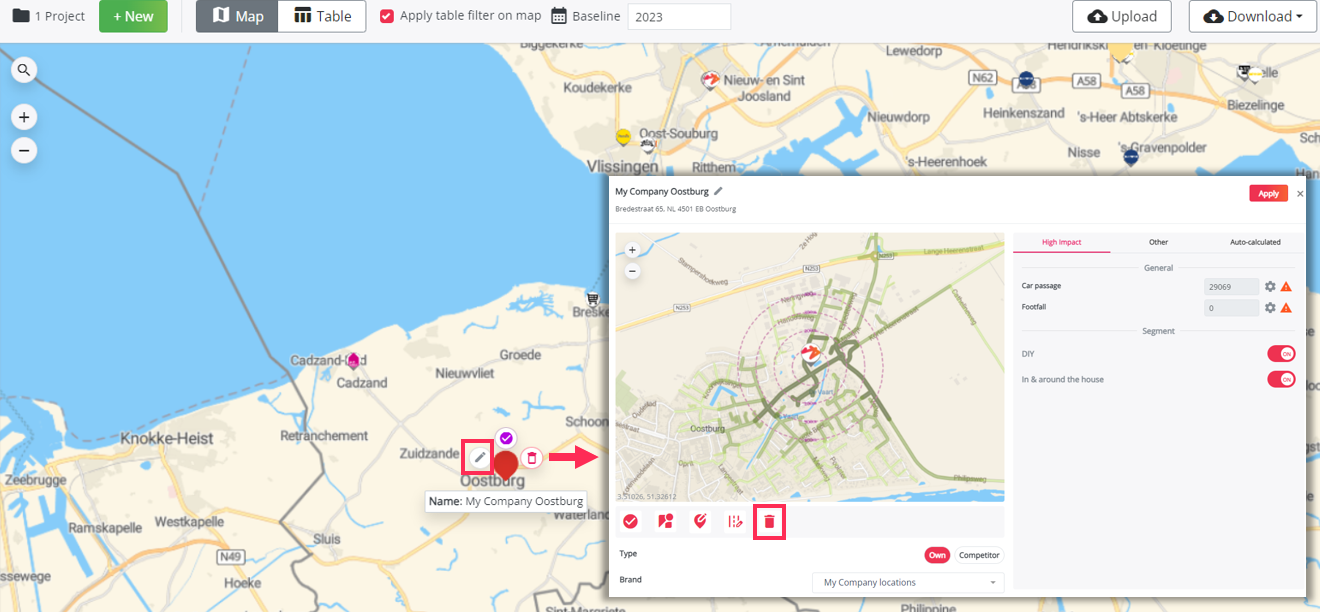
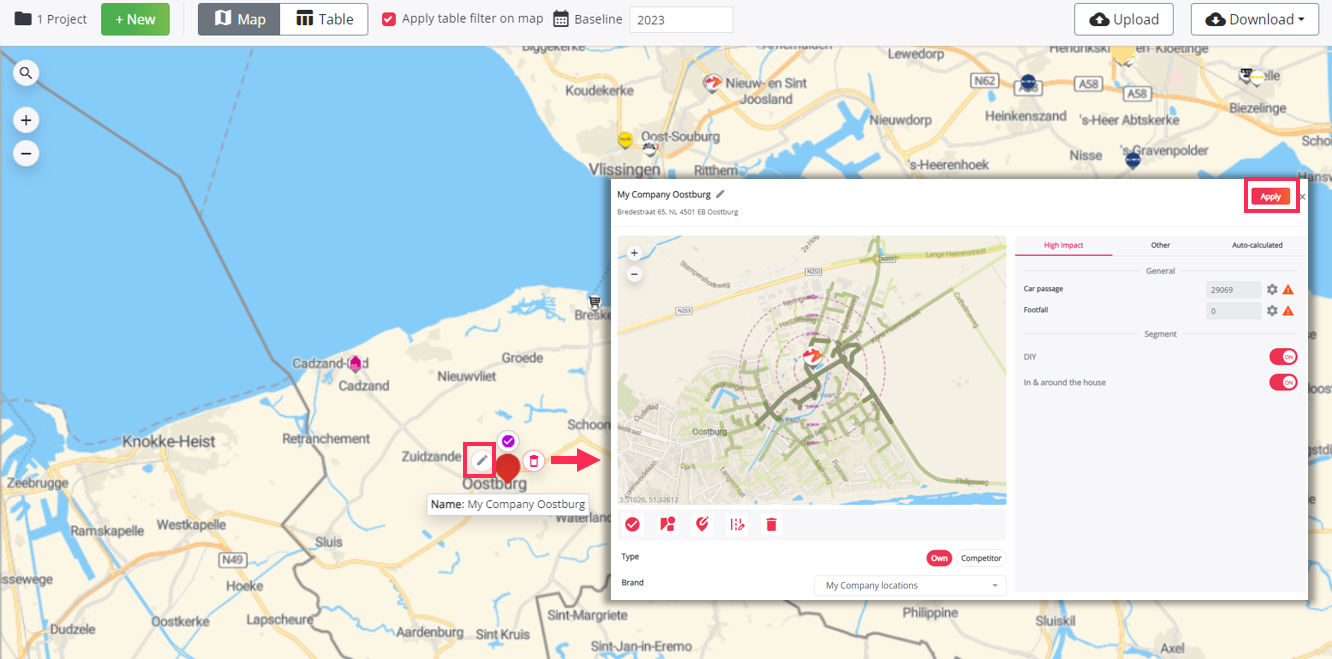
- Go to the Map view.
- Click the location you want to update.
- Select the edit icon.
- Adjust the preferred location characteristics (see below)
- Click Apply to save your changes.
- Recalculate the results by clicking Run exercise.

Here are the things that can be validated or adjusted:
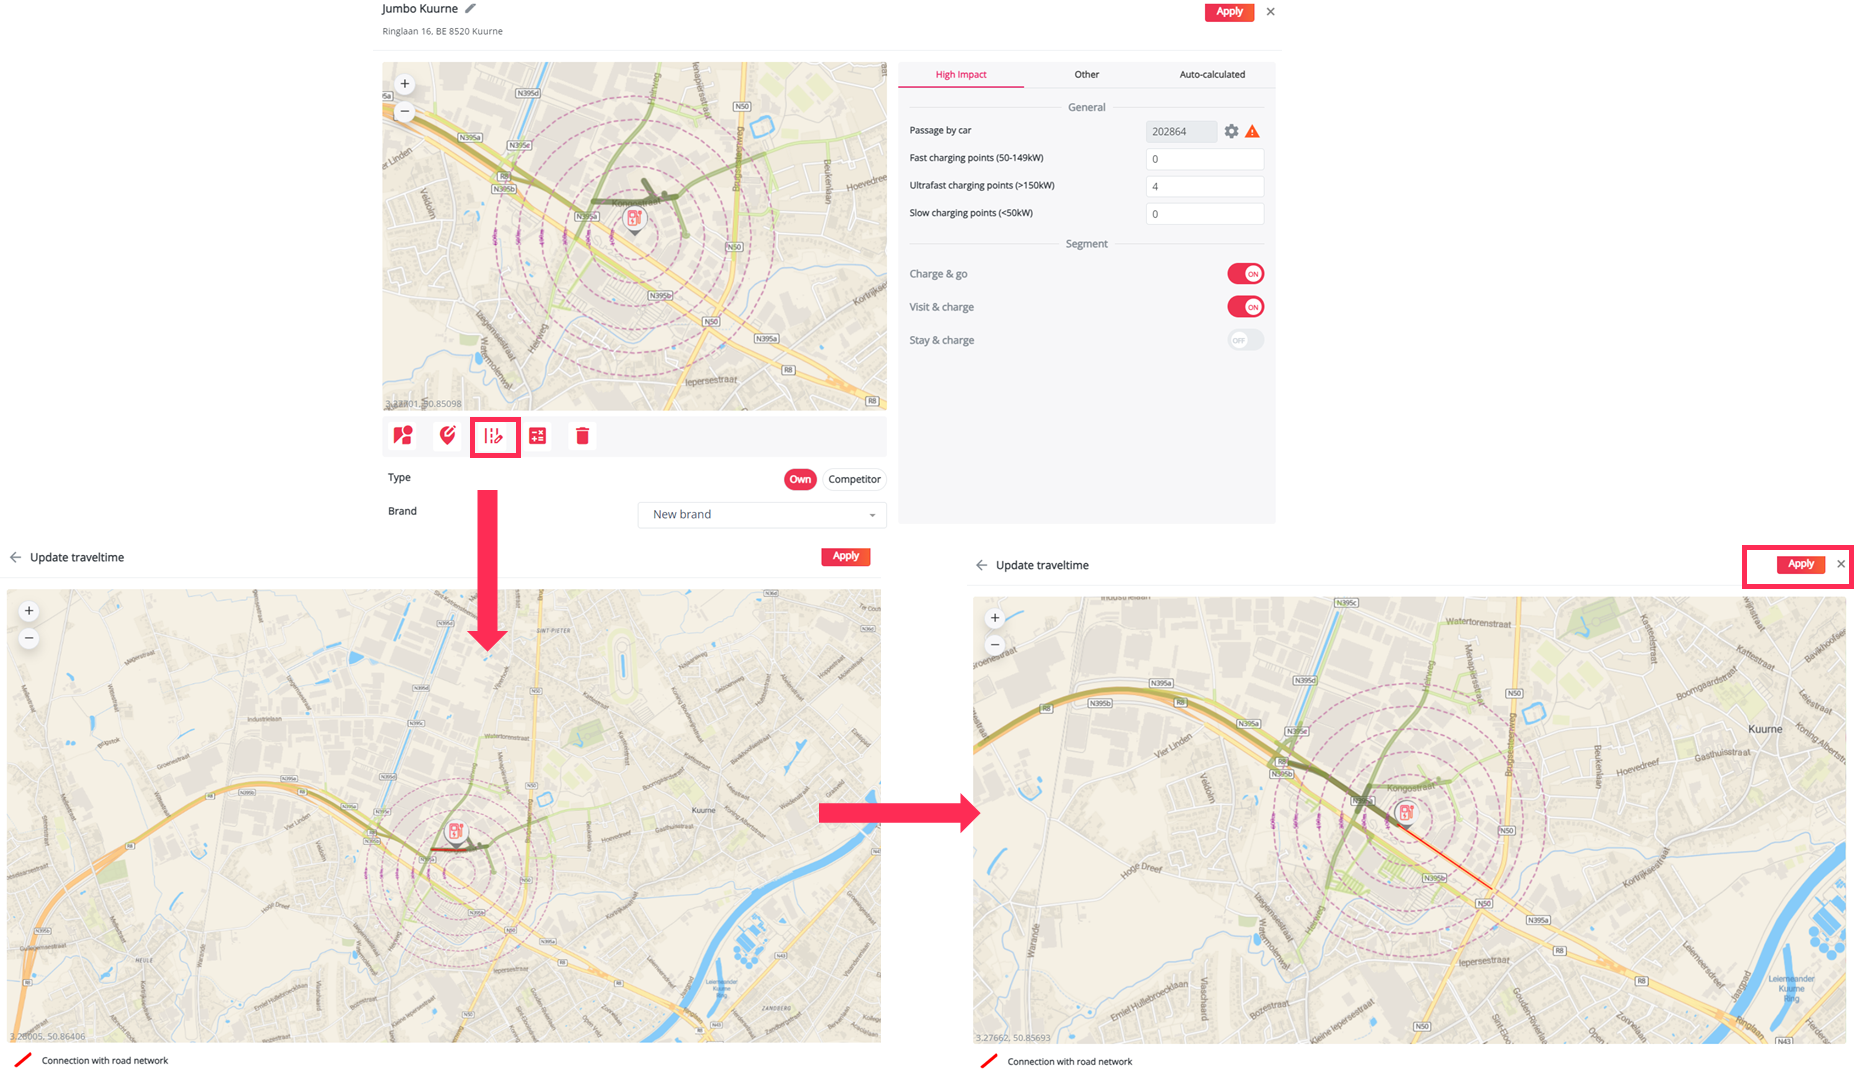
1.The road snapping
If a location has an unexpectedly low result, this may be caused by an incorrect connection between the location marker and the road network. You can validate and update this connection on the map.
Road snapping determines which road segment is used as the starting point for travel time calculations. It is important to verify that the location is correctly connected to the road network.
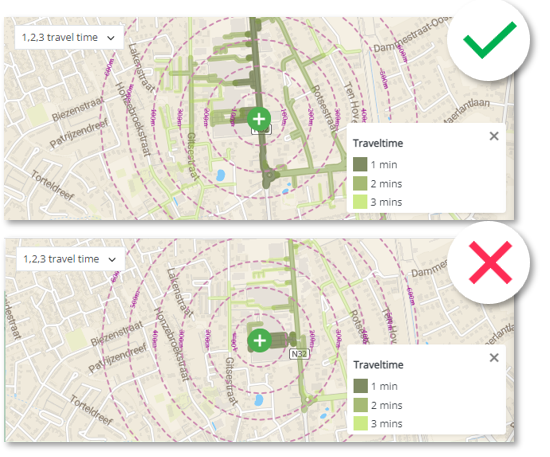
Verify whether the location can reach the correct road segments within 1 minute of car travel time. If the connection is not correct, you can update the travel time snapping by selecting a different road segment as the main starting point. For example, you can choose the road segment closest to the entrance of the site, such as the entrance to a shopping center or the access point of the location.
To update the travel time snapping:
- Click Update travel time.
- A new window will open.
- Click another road segment to define the new snapping point.
- A red line will appear on the selected road segment.
- Click Apply to save the new travel time snapping.
- Validate the updated connection using the road map layer.
2.The high impact characteristics
This section shows the objective location characteristics that have an important impact in the model. Here, you can review the configuration that was entered when completing the template.
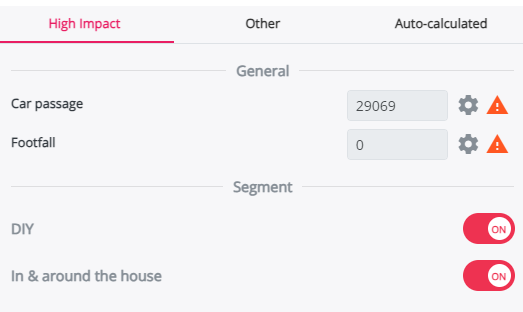
- Car passage
This parameter indicates the number of cars per week that pass by in the area and from which your location can capture passing drivers.

- Segment
This parameter indicates the segment or segments to which the location belongs. You can switch each segment on or off for the selected location.
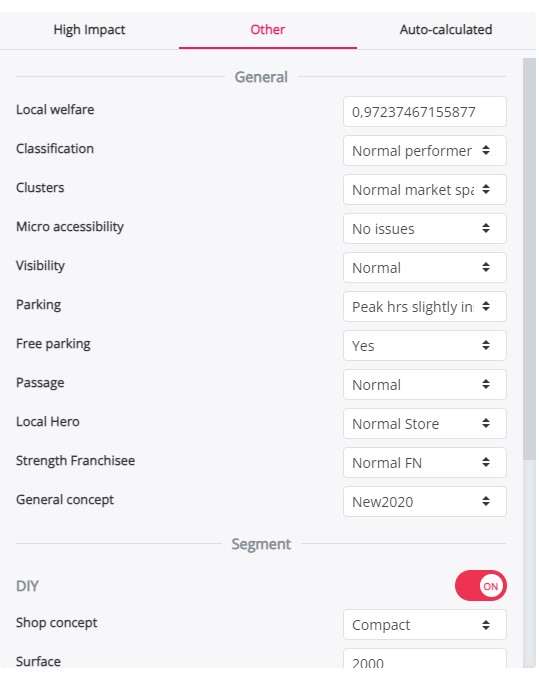
3.Other impact location characteristics
This section shows the qualitative location characteristics of the site that also have a significant impact in the model. Review these characteristics carefully and update them if needed before recalculating the results.
Update locations in bulk
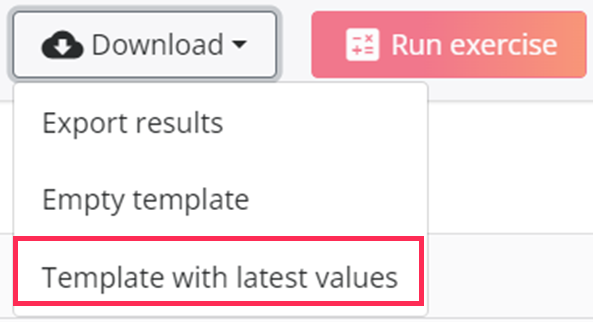
If you want to update multiple locations at once, you can export the latest project template, adjust the values, and upload the updated file again.
To update locations in bulk:
- Click Export.
- Select Template with the latest values.
- Complete or update the template by following the guidelines in the article Prepare your list of locations in the template. Make sure the UUID* is completed for existing locations. Leave the UUID blank for any new locations you want to add to the project.
- Upload the completed file by clicking Upload.
- Run the project again by clicking Run exercise.
*The UUID is the unique identifier of an existing location in the project. Keeping the UUID ensures that the platform updates the existing location instead of creating a new one.