
Define custom map layers
INTRODUCTION
By defining custom Map Layers, you can visualize shapefiles within the platform.
HOW TO
Go to Admin/settings > Map Layers > Overview.
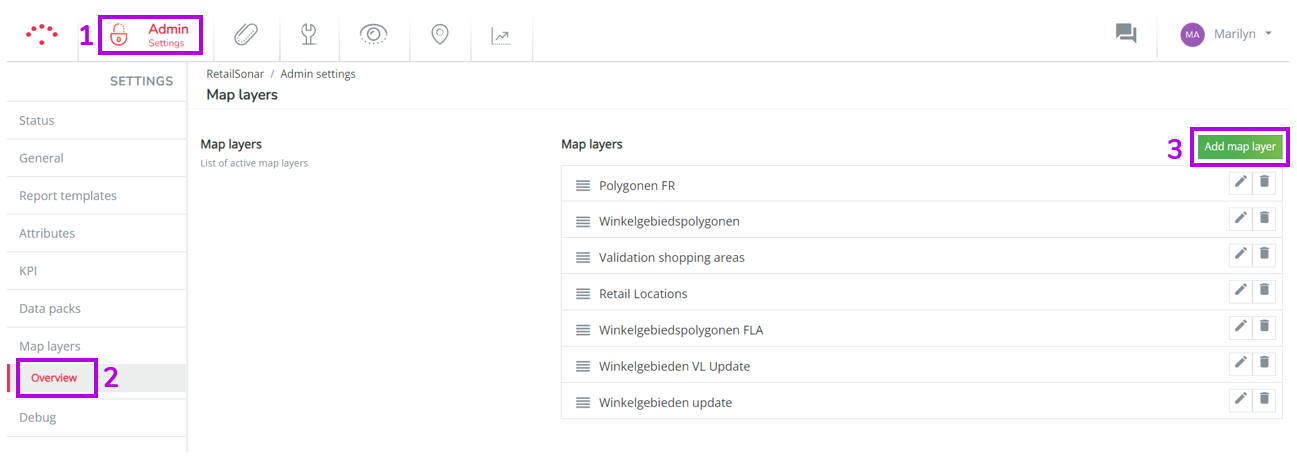
To add a new map layer, click on 'Add map layer' and complete the pop-up form with the following details:
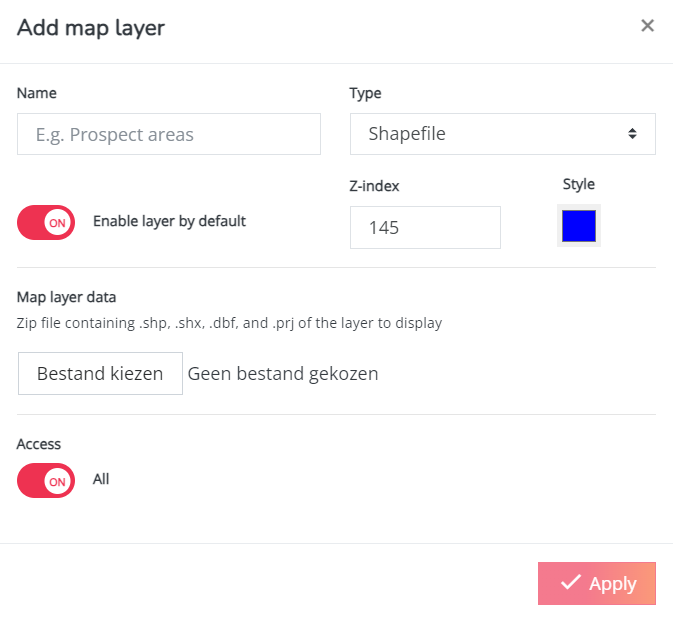
- Name: Enter the name for your new map layer.
- Type: Currently, only Shapefile is available.
- Enable layer by default: Switch this on if you want the custom map layer to always appear when you log in.
- Z-index: Set whether this layer should be displayed above or below other layers.
- Z-index is typically set at 205 as the layer will fit right under location perspective markers, but above everything else.
- Style: Choose the color of the shape. Only one color per shapefile is supported at present.
- Access: Select who can view this layer, either everyone or specific users.
- Map layer data: Upload the required data.
- It is important that you put .shp, .shx, .dbf and .prj file in one single folder
- Create a .zip file containing this folder before uploading.
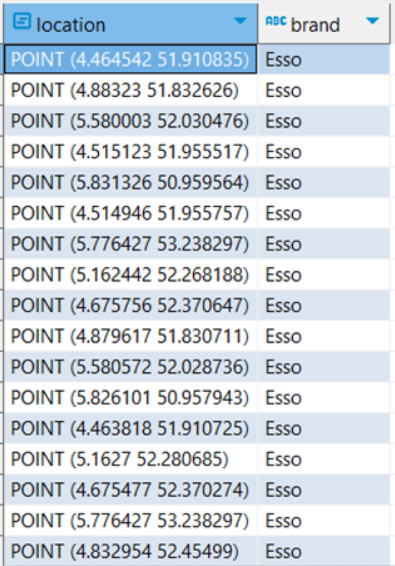
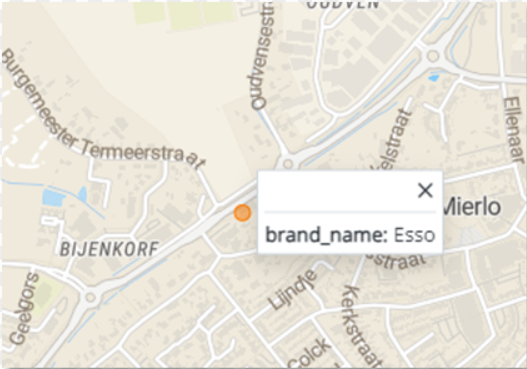
!TIP You can add characteristics to your shapefile by adding them in the columns of your shapefile. This allows you to click on your map layer in the platform and see the parameters of that shape. You can find an example on these screenshots:
By following these steps, you can successfully create and add a new map layer with the specified attributes and data.
Remark! All columns attached to the uploaded file will be visualized in the pop-up that appears when you click on the shapefile item in the platform.